Using our brick mesh sheets for installation is 10 times faster than laying individual brick tiles, and require minimal construction skills. However if you are time-poor and require installation fast, please contact us as we provide affordable installation services too.
Step 1 prepare the substrate wall
Remove any existing wall cover plates or skirting boards if applicable (if you are concerned about the brick tiles being thicker than these items).
For painted wall surface - lightly sand down the entire wall, wipe clean with sugar soap

For unpainted virgin walls - wipe off any dust
Step 2 Unpack the brick sheets and lay the sheets out
Do NOT skip this step. Tile adhesive usually dries within a short amount of time and you would want to ensure you have adequate sheets for your intended work area so as not to waste adhesives and going through the steps all over again.
When you lay out the tile sheets against the wall you are working on, you can easily mark and cut the required end pieces. This would speed up the laying process, and minimise the possibility of adhesive drying in the bucket immaturely.
Step 3 Cut the end pieces
It will save your more time by doing the cutting before you do the installation. Use a wet tile saw and wear our supplied mask (in the tool kit).

Step 4 Use a spirit level to check and mark horizontal guide lines
Even though laying the brick sheets are usually ok even with the naked eye, for large wall areas we recommend using a pencil to mark out a horizontal line for each row of sheets as a guide.

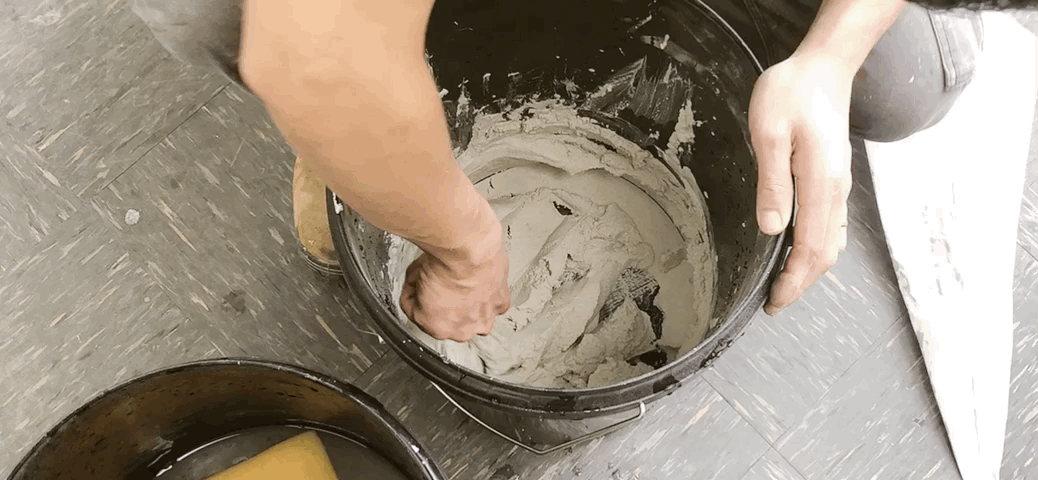
Step 5 Mix tile adhesive and apply to the desired area
Follow the instruction on the adhesive bag.

Apply to the area you are working on (not the entire wall, to avoid premature drying if the wall is big). Start from the corner pieces, if you have a wall corner you need to cover. Otherwise go straight with the flat pieces.
Use the supplied trowel to go across the work area. Start from the top or bottom corner. Do not cover your horizontal guide lines.

Step 6 Lay the brick sheets
If you have corner sheets, start with the corner sheets first, by gently pressing it into place. Please note that many old wall corners are not 90 degrees! In this case you will notice the corner piece does not fit snugly onto the wall corner, which means you should adjust the adhesive thickness to compensate for the uneven wall corners. Most of the time this would not be noticeable after the project is mortared in and finished. Do not force the brick corner piece into a non-square wall. Thin bricks are brittle and this force may break the corner piece.

Then lay the flat sheets. Do not use a hammer or mallet. They could break from the hammering forces.

Do it in sections to avoid the tile adhesive drying prematurely. The mesh comes as 4-row sheets but you can cut the sheets easily with a scissor. In this video we did 6 rows so it is 1 and a half sheets.

Step 7 Let dry, then grout
Leave the work area to dry for 24 hours then prepare the mortar grout. Mix until you reach a thick workable state (use a paddle or by hand). The grout should not flow around when you tip the bucket. Remember the pot life of the grout is about 1hr, so don't prepare too much at one time.
Cut the tip of the piping bag to the appropriate size (e.g. 10mm diameter). Fill the piping bag and start piping the mortar in lines. If you are using a much darker grout on a light coloured brick, you may need to tape the brick edges to protect them from being stained.

Once the entire surface is covered, you can add the finishing touch to the grout.
For a flush look use a damp (but not water dripping) dense sponge to wipe the excess mortar off.

For a concave look use a jointing tool or the supplied jointing dowel (in the tool kit) to go over the mortar lines.

For a rustic rough look use the supplied brick brush (in the tool kit) bristle to knock the mortar lines. Please do it promptly after grouting as the grouting can dry once it's in touch with the bricks. This will create an irregular and more textured finish. The brick brush is also used to clean off excess mortar and sand off the bricks. Bricks may appear off-coloured after grouting as it sucks in the water. The colour will return to normal when dry.

Use the brush to clean off any dust and final excess mortar. Voila, your project is finished!